Email: [email protected]
Buying a good granite crusher is only half of the job. If the installation and commissioning are done poorly, even the best PE jaw and cone crushers will give low capacity, high vibration, and frequent breakdowns. For many quarry owners, the real pain point is not choosing the machine, but getting it installed correctly and reaching stable production quickly.
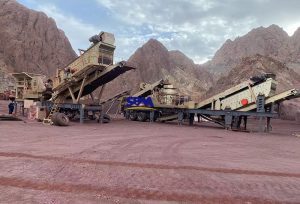
This guide focuses on the practical installation and start-up steps of a typical granite crushing plant using a PE Series jaw crusher as the primary crusher and a cone crusher as the auxiliary crusher. It does this by helping you move from “paper equipment” to “equipment that produces real tons.”
Before Installation: Site and Foundation Preparation
Many subsequent problems (cracks, vibrations, downtime) stem from insufficient preliminary preparation. Before officially hoisting the machine, it is recommended that you confirm the following:
- Check civil foundations against drawings
- Verify anchor bolt positions, foundation dimensions, and elevation levels match the supplier’s layout.
- Use proper concrete grade and curing time, as recommended, especially under the primary jaw and cone.
- Plan material flow and access
- Make sure truck unloading, hopper, and stockpile positions allow safe, direct movement without sharp turns.
- Reserve enough space around the jaw, cone, and screen for maintenance platforms and crane access.
- Prepare utilities and infrastructure
- Confirm electrical power, control room, water supply for dust suppression, and drainage systems are in place.
Making these preparations can help avoid common on-site problems such as “the equipment arrives at the site only to find that the foundation is incorrect or the power is not connected properly.”
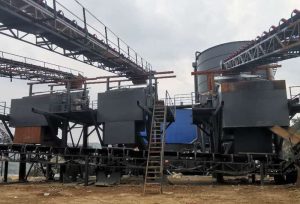
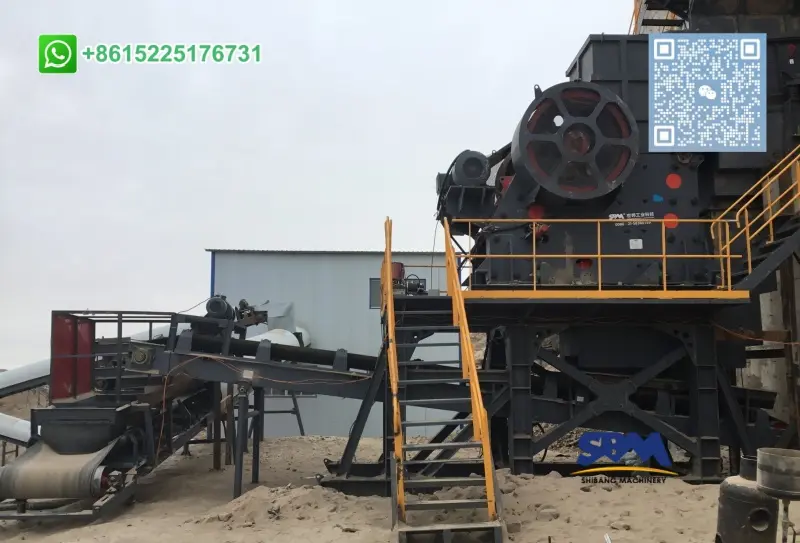
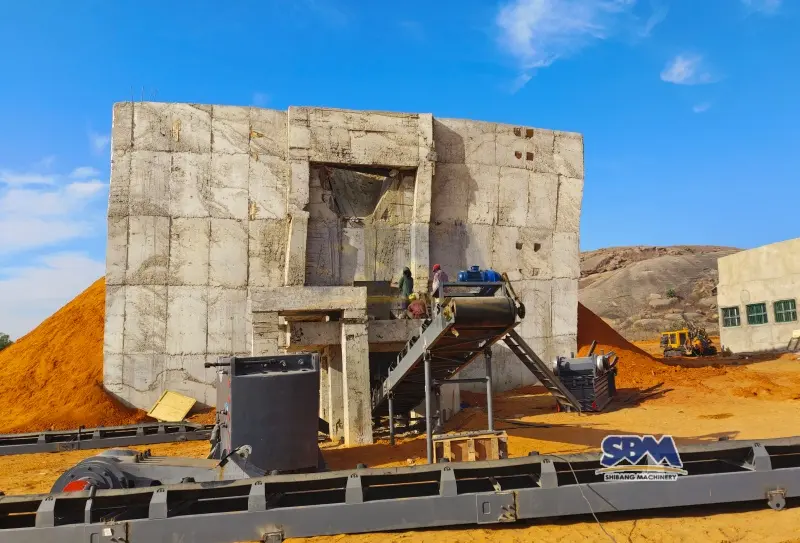
Installing a PE Jaw Crusher for Granite
The PE jaw crusher is the first main unit on the granite production line, and its installation quality directly determines the stability of the entire line. The key steps can be summarized as follows:
- Positioning and leveling
- Place the jaw crusher on its foundation and ensure it is level in both longitudinal and transverse directions.
- Uneven installation can cause abnormal vibration, uneven bearing loads, and faster wear of jaw plates.
- Anchor bolt tightening and grouting
- Tighten base bolts according to torque specifications and grout the base after alignment is confirmed.
- After initial running‑in, re‑check and retighten anchor bolts, because vibration can loosen them.
- Aligning the feeder and discharge
- Make sure the vibrating feeder discharges centrally into the jaw, without hitting one side of the chamber.
- Align the jaw discharge with the downstream conveyor or transfer chute to avoid spillage and impact points.
These actions may seem basic, but many users overlook the details on-site, resulting in “the whole machine always shaking” and “the liner being worn unevenly,” which eventually leads to wear and tear and cost issues.
If you would like to learn more about how to choose the right main crusher model, please read Best Jaw Crusher for Granite.
Installing a Cone Crusher in a Granite Line
Cone crushers experience significant stress in granite conditions. If proper installation is not followed, serious malfunctions such as spindle breakage and bearing overheating can easily occur. The following points are recommended:
- Foundation and frame contact
- Ensure the cone crusher frame sits firmly on the foundation without rocking.
- Use proper pads or grout to eliminate any gaps and distribute load evenly.
- Check lubrication and cooling systems
- Install and flush lubrication lines, filters, and coolers before first start.
- Confirm oil type, oil level, and flow rates meet the manufacturer’s requirements.
- Feed arrangement
- Install feed chute or distributor so that material enters the cone centrally and is evenly distributed.
- Off‑center feeding causes uneven liner wear and can lead to serious mechanical stress.
By controlling these installation steps, we can significantly reduce the early failure rate under granite working conditions. Furthermore, we are able to reach a stable production state more quickly.
Electrical, Control and Safety Interlocks
Many accidents and downtime are not caused by problems with the crusher itself, but rather by deficiencies or incorrect connections in the automatic control and safety logic. For granite production lines, users are advised to pay particular attention to the following:
- Motor wiring and rotation
- Check each motor’s rotation direction before loading material, especially for jaw, cone, feeders and conveyors.
- Wrong direction on feeders or crushers can cause blockages or mechanical damage.
- Interlocks and start/stop sequence
- Implement a logical start‑up sequence: dust collectors → conveyors → screens → secondary → primary → feeders.
- Shutdown sequence should be reversed: stop feeders first, then crushers, then conveyors after the line is empty.
- Emergency stop and safety devices
- Install emergency stop buttons at accessible locations along the plant.
- Integrate metal detectors, pull‑cord switches, and belt misalignment sensors where necessary.
These configurations directly affect the safety of on-site personnel and downtime losses, which are practical issues that decision-makers are very concerned about.
Commissioning: From Empty Run to Full Granite Load
The “commissioning phase” after installation often determines the final capacity and stability of the entire production line. We can break the process down into several steps for users to follow:
- No‑load test
- Run each machine individually without material to check vibration, temperature, noise, lubrication, and electrical behavior.
- Fix any abnormal conditions before feeding granite.
- Light‑load test with gradual feeding
- Start with a small feed rate and gradually increase to about 50–70 % of design capacity.
- Observe current, pressure, and product size; adjust CSS and feeder speed as needed.
- Full‑load test and parameter optimization
- Run at or near design capacity for several hours.
- Fine‑tune jaw and cone settings, screen angles, and feeder rates to balance all stages.
- Recording baseline data
- Record key parameters (ampere, throughput, product gradation) and initial wear status after the first days.
- These baseline records will help track future performance and identify deviations early.
Such a phased production process can help us avoid the chaotic situation of “operating at full capacity as soon as it comes up, and then constantly blocking and stopping”.
More details are available on how to reduce wear when crushing granite.
Common Installation and Commissioning Mistakes in Granite Plants
In this article, we specifically list typical errors during the installation and debugging phase, providing users with a “checklist” for self-checking:
- Skipping foundation checks
- Assuming “the civil work must be correct” and installing anyway, only to find misalignment and cracking later.
- Ignoring leveling and alignment
- Not checking level and center feeding for jaw and cone, leading to strong vibration and uneven wear.
- Starting with full load immediately
- Feeding full granite load on day one, before confirming lubrication, cooling, and control logic under light load.
- No detailed commissioning record
- Failing to record settings and performance during the first weeks, so future troubleshooting has no reference.
These errors reflect real user problems: unstable output and frequent malfunctions after installation, yet users can’t pinpoint the cause. We’ve listed the correct solutions for these issues. If you don’t find the answer you’re looking for, you can consult us online.
FAQs About Granite Crusher Installation and Start‑up
1. How long does it take to install and commission a granite crushing plant?
For a typical small to medium granite plant, mechanical installation may take a few weeks depending on foundation readiness and crane access. Commissioning—from no‑load tests to stable full‑load production—often requires several days to a couple of weeks, especially if fine‑tuning and operator training are done carefully.
2. Can we install a granite crusher plant ourselves without the supplier’s engineers on site?
It is possible if your team has strong mechanical, electrical, and civil experience and follows the supplier’s drawings strictly. However, for first‑time granite projects or more complex plants, having the supplier’s commissioning engineers on site usually reduces start‑up problems and speeds up the path to stable output.
3. What should we check first if the new granite plant cannot reach the design capacity?
Start by confirming simple basics: feed size and rate, jaw and cone CSS settings, screen condition, and whether any stage is over‑ or under‑loaded. Then check power consumption, vibration, and material flow for signs of misalignment or bottlenecks. Fine‑tuning these parameters often recovers a significant part of the missing capacity without changing machines.